Follow the steps in the video below, or scroll down for a simplified step by step tutorial! (Turn off "Music" to listen to the video!)
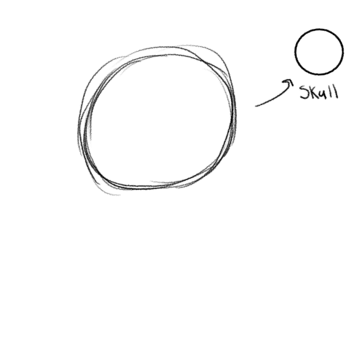
Step 1: The Circle is the Head
10 easy steps to draw a face with hair! We are drawing in a 3/4 view so there are some special rules we have to follow for this tutorial. For now let's stick to the part all angles of the head have, the skull! Simply draw a light circle, it doesnt have to be perfect, just the best you can manage as we use it to help use find the rest of the facial features.
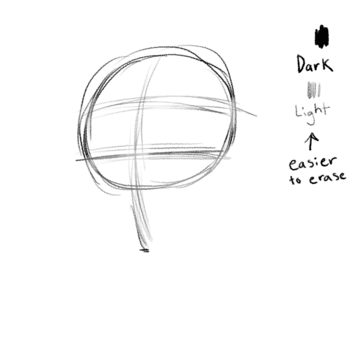
Step 2: Guidelines, Guidelines, Guidelines!!
Make 2 lines horizontal across the face and on curved line starting from the top of the circle, sliding down in an angle as shown in the picture above. This line is curved so that it will create where the middle of the face is facing, this is the start of the 3/4 angle view. Make sure these lines are dawn lightly so that they can be erased later!
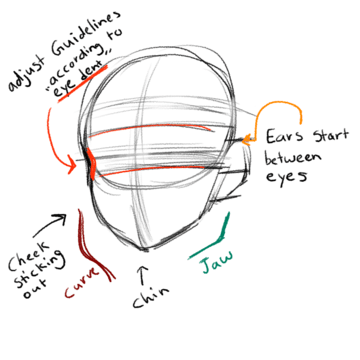
Step 3: Building the Face
The guidelines help form the end of the chin and ears which reflect where the eyes and the rest of the face will be placed.
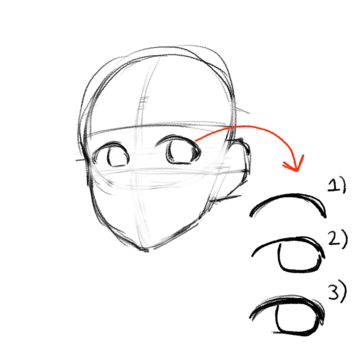
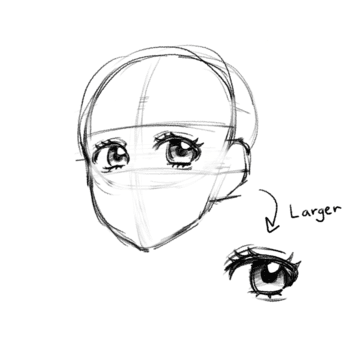
Step 4: Eye Placement
Add a semi-circle and then a circle inside it for the eyes. Depending on how much you decide to curve the semi-circle will determine the eye shape, almond, round, etc. The eyes can be drawn in many ways and styles however, one thing remains the same. We draw the right eye larger than the other eye, this gives the illusion that this eye is closer to the front than the other eye and side of the face.
Step 5: All in the Little Details
The eyes are the windows to the soul. Give your character (drawing) personality. thicken the outer lines, then add short curved lines to elude to eyelashes. Add highlights in the eyes by leaving a bank white circle in the eyes, place them in the same area in both eyes as these are created by light hitting the eyes. Next add details in the irises by shading downwards from dark to light. Remember not to press too hard in case you don't like what you drew! Finally, add eye folds or leave the eyes as monolids. It all depends on what you like!
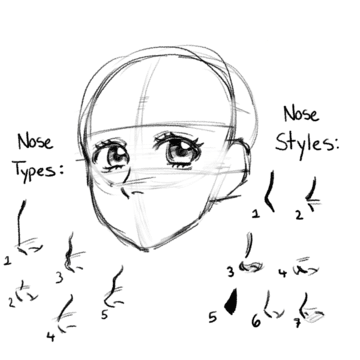
Step 6: The Noses turn to Shine
Noses are drawn in various detail depending on the artstyle. Sometimes simply drawing a line on the face is enough indication, but play around and see what style of nose you enjoy drawing. If you're unsure, copy one of the noses drawn in the image above! When you've selected what you want to draw, place the nose under the eyes on the vertical guideline. Keep the nose closer to the left eye to continue the 3/4 angle illusion.
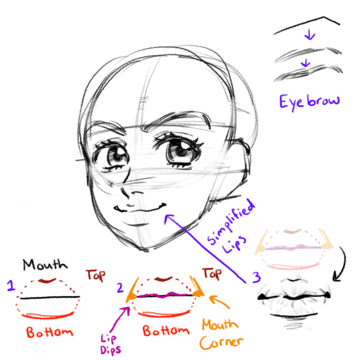
Step 7: Keys to a Good Expression
The eyebrows and the mouth, they are all about expression. Depending on whether you want you character to be sad, happy or something else you have to use these facial features to really sell the expression you're trying to convey! Mouths can be as simple as a few lines curved upr or down for a smile, same with eyebrows. If you want to go the extra mile, add a small line under and above the mouth to give the illusion of lips. Same with the eyebrows, for more detail, just add more lines that following a single direction like the image above!
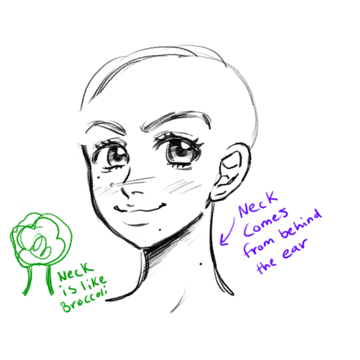
Step 8: A Neck as strong as Tree... or maybe just Broccoli
Now that were are finished the face, we can erase the guidelines from earlier. Next we can add the inner lines of the ear by simply copying the image shown above! Then we have to add the neck, to do that think about broccoli, it's thin in the middle of the stem. Likewise we start a line from under the ear, then draw the other line from under the neck. Then make them curve in opposite directions to make the neck. If you are unsure, revisit the image show above on how the neck is drawn.
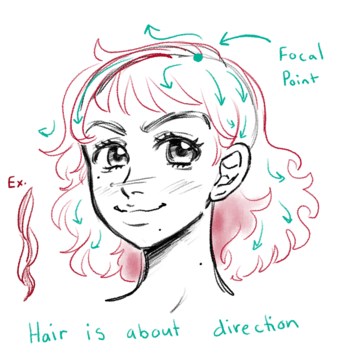
Step 9: The Direction of Hair
Hair can be simplified into clumps by following the same direction. To do that we need to find the focal point of the hair, like the starting point. You can copy the one shown above or try placing it in a different area on the head. Follow the direction and slowly spread it out.
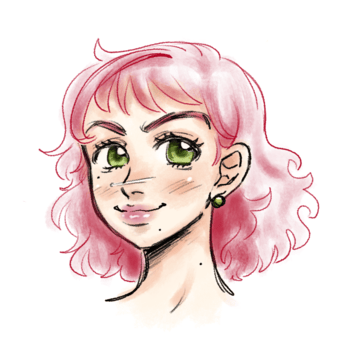
Step 10: Finished Drawing
And you're done! I hope you enjoyed this tutorial, you can always scroll back to any step for more help. Now have fun with your new original character!